React-Redux Setup

Search for a command to run...
No comments yet. Be the first to comment.
💡 “So if you want to go fast, if you want to get done quickly, if you want your code to be easy to write, make it easy to read.” -By Robert C. Martin JavaScript has progressed a ton in recent years. If you are learning JavaScript in 2022 and you ...

Before beginning our quest to find how not to use Create React App. First, let’s see why we need Create React App in the first place. Why do we need Create React App? 🤔 Create React App is a comfortable environment for learning React and is the best...

Getting Started with Node.js In this blog, we will try to understand the basics of Node.js, how it works, and why to choose Node.js, but before diving into node let's talk a little bit about Java-script. JavaScript is one of the best programming lang...

If you are reading this, you probably know what React.js is and might have already used it Earlier. However, you might be wondering why I am reading about folder structure? Can’t I just stuff all my files in the src folder?? 🤪 Technically you could ...

Let’s first understand 🤔 What is an Array? Quoting from MDN directly. The Array object, as with arrays in other programming languages, enables storing a collection of multiple items under a single variable name and has members for performing common...

Everyone knows and loves React and Redux. So before we understand Redux Setup Let’s first understand ........
Redux is a predictable state container designed to help you write JavaScript apps that behave consistently across client, server, and native environments and are easy to test.
With Redux, the state of your application is kept in a store, and each component can access any state that it needs from this store.
Redux allows you to manage your app’s state in a single place and keep changes in your app more predictable and traceable. This is particularly helpful if the app is going to scale as managing too many states and communicating between components (state management) becomes tougher.
Let’s look into how one can use Redux with React
npx create-react-app my-app --template redux
#Using npm
npm install react-redux

#Using Yarn
yarn add react-redux
Before starting to use Redux this should be kept in mind that
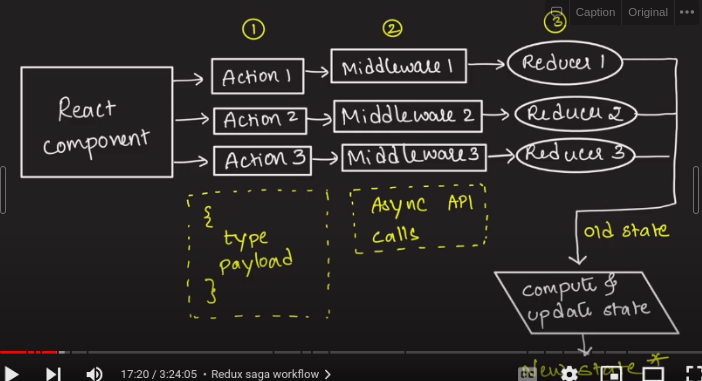
Here is an image to show you the flow of state updation using Redux
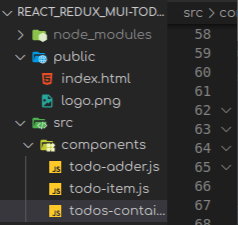
This is an example image for structuring components under /src folder.
To understand the directory structure of React and its uses this article can be followed which is written by pankaj basuri
Best Practice To Manage Folder Structure For React.js
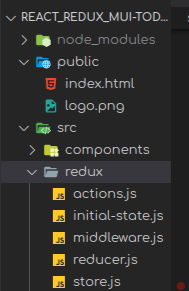
Within the /src create a folder Redux which will have .js files for action, middleware, store, reducer, and initial state. These are the basic structures of any Redux Project.
In index.js, ReduxApp is created for connecting Redux, and Provider is imported from react-redux. Also to act as store provider which we have created using provider we are binding the store to our application importing store from store.js
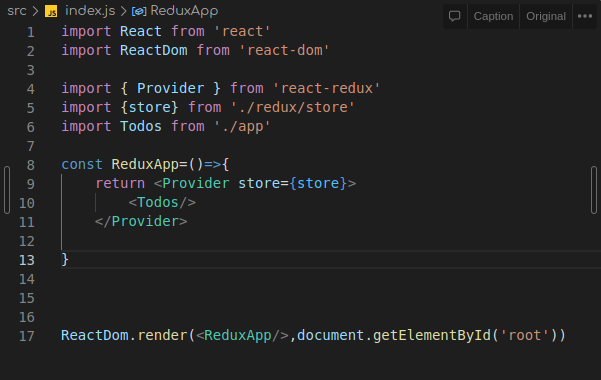
In ReduxApp then we are using the store as our context and we wrap everything inside the Provider tag importing Todos from app.js.
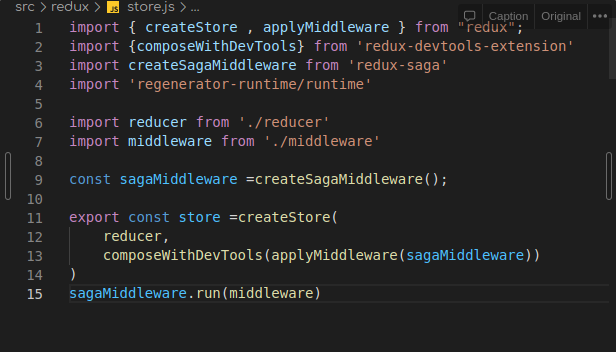
For populating the state and we need to create a middleware and bind the middleware.
We import packages in store alongside reducer and middleware and created a saga middleware using createsagaMiddleware. We create a store using createStore API and then using saga middleware we pass middleware and reducer, we are wrapping it in chrome dev tools.
Then we need to call the saga middleware and run it to make it work
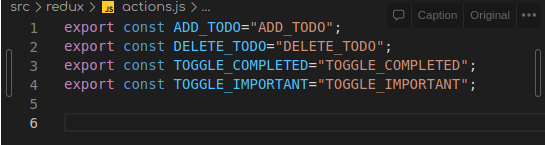
We define actions in action.js
Then we define an initial state in form of an object in initial-state.js.
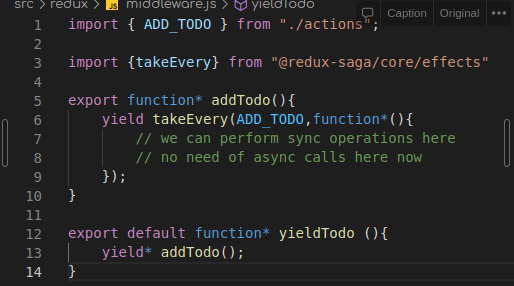
We handle async operations using generator functions in middleware.